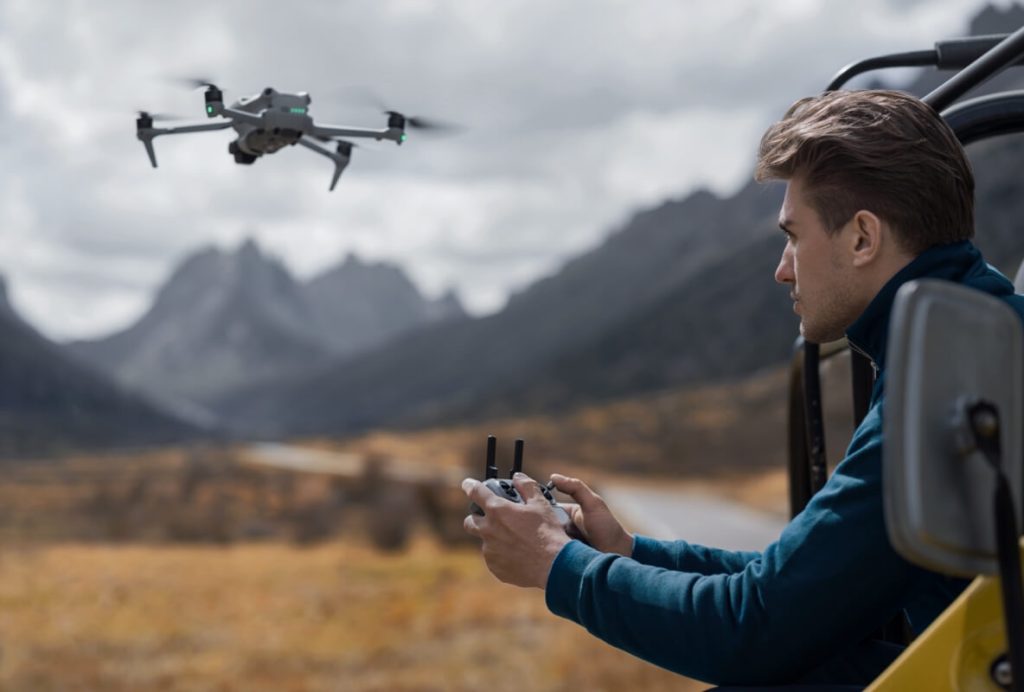
DJI has released a firmware update for its RC Pro 2 and RC 2 drone controllers, introducing a screen lock feature that enhances device security through password protection.
The update brings firmware version v01.00.0300 for the RC Pro 2 and v06.00.0200 for the RC 2. It also requires the DJI Fly app to be updated to version 1.17.4 or later for the new screen lock to function properly.
This added layer of security allows users to set a password that must be entered each time the controller is powered on. While it may seem like a minor addition, it offers valuable protection for users operating in shared environments or storing sensitive footage on the controller.
>>>New 4920mAh WB37 Replacement Battery for DJI T100
Users are advised to keep their password secure. Forgetting the password requires a full system reset, which will erase all saved media and settings on the controller.
DJI also notes that the update includes fixes for unspecified known issues, though no further details were provided.
Getting your hand son the brand-new DJI Air 3S might be trickier than anticipated as the company is having issues importing its latest drone to the US. For the time being, it might only be possible to purchase the drone from DJI.com directly, not through any third-party stores.
This isn’t anything to do with the ban bill which passed in the US House of Representatives earlier this year. Instead, DJI claims it’s because the Department of Homeland Security incorrectly believes the drones were produced in forced labor camps and is blocking the drones using the Uyghur Forced Labor Prevention Act.
In a letter it sent to distributors – which has been shared on social media – DJI refutes these accusations stating “DJI strongly affirms that no forced labor is involved at any stage of our manufacturing process.
“Our company does not and has never operated manufacturing facilities in the Xinjiang province of China, nor do we obtain any materials from that region. All of our manufacturing is based in Shenzhen, where our company is headquartered, or Malaysia.”
Following up with a post on its official blog DJI says it has all of the evidence it needs to clean up this “misunderstanding” and prove it doesn’t make its drones in the Xinjiang region of China.
Until the issue is resolved however it’ll be harder for US businesses to get their hands on DJI’s enterprise and agricultural drones, as well as regular folks from snagging the DJI Air 3S – at least from retailers other than DJI itself.
Even if this existing issue is resolved, DJI’s future in the US will remain uncertain.
The wider US import ban is still looming, and while it has yet to pass through the Senate it feels like it may be a matter of when, and not if, unless there’s a major attitude shift in the US government.
Though the ban looks set to only affect imports as it is currently written, so if a DJI drone catches your eye, you should still consider grabbing it – as already-approved models won’t be permanently grounded even if a ban does pass.
So take this DJI Air 3S issue as a taste of what’s unfortunately likely to come in the coming months and years from the world's best drone manufacturer.
If you are into content creation, photography or survey mapping, a drone is what separates an okay shot from a mind-blowing one.
How? The angles and clarity from a drone aerial shot make all the difference. It is challenging or impossible to achieve this level of clarity and coverage from ground-level views.
However, you need to fly your drone carefully and safely.
If you don’t, you could end up hurting others, negatively impacting your goals, and attract hefty fines and penalties.Nonetheless, with the help of this guide, you will understand the legal requirements, regulations, and safety guidelines, allowing you to fly your drone safely in American.
Even though you don't have to take a class to fly a drone for fun in the US, you still have to take a basic 15-minute knowledge test and, if your new drone weighs more than 249g, register with the FAA. Neither is a huge burden—the TRUST test is free to take and impossible to fail. It's more about making sure that you understand the content.
As for registration, the FAA charges a reasonable $5 fee for hobbyists. This gives you a registration number to add to your aircraft and covers as many drones as you own. You'll need to remember to renew it every two years.
There are some very basic rules of the sky to follow—we have a separate article that goes over them in detail. In short, keep your drone at least five miles away from an airport, keep it at or below 400 feet of altitude, don't fly over crowds of people, and keep it within visual sight range.
Chances are you did some research before spending a few hundred dollars (or more) on a quadcopter. But if you're not sure about what your drone can do, it's time to figure that out.
The latest top-end models pack helpful safety features, but you need to understand what they do and how they work before you can rely on them. Obstacle avoidance is a big one—a lot of drones have it, but it doesn't always work the same way. Is it always on in your model? Will it automatically navigate around obstacles, or will it simply freeze the drone in place when it detects something blocking its path? Are the sensors on the front only, or on multiple sides of the aircraft?
You should also understand how the automated return-to-home function works. Pretty much every drone with GPS will fly back to its takeoff point if it loses the control signal, or on demand. You can typically set an altitude for the home flight. This is especially critical if you are flying in an area with trees or other low-altitude obstacles—make sure the drone is set to ascend to a safe height before the automated return.
You should be intimately familiar with the location of the return-to-home command, whether it be a physical button on your drone's remote control or an icon in a companion app for your phone. You should also see if your remote has a Pause button that causes the drone to stop and hover in place.
And, although it's a last resort, you should also learn how to cut power to your drone's engines in the event of an emergency. I've seen some models fly away unexpectedly, and I'd rather pick up the pieces of a crashed drone and recover a memory card than have the aircraft fly away, never to be seen again.
One of the FAA's rules for recreational flight is that you place a sticker with your registration number on your drone. If you do lose a drone in the wild, there's a chance that someone could look up your registration details and get the aircraft back to you—though I wouldn't hold my breath on that happening.
In addition to controls, you should be aware of how long your drone can fly on a full battery charge. There are typically on-screen indicators of battery life in the app that can help you plan out flights. Most consumer models fly for between 25 and 40 minutes on a fully charged battery.
You should also note where your drone's control app shows telemetry data. Typically, you get a real-time feed of airspeed, altitude, orientation, and location on a world map, in addition to the live feed from the camera. It's important to be able to recognize and process this information while you fly.
So, you know how your drone works, how to activate its emergency safety features, and how long it can fly on a battery charge. All set? Not yet.
The next step is to actually learn to fly the thing. You can get started in a few different ways. If you're cautious, consider working with flight simulation software first. Some control apps include the feature, but if it doesn't, consider grabbing a drone flight sim from the Android or iOS app store to practice in a virtual environment.
If you're more likely to do better in a classroom environment, consider an online training course.
If you want to skip the simulator, I recommend restricting early flights to areas without a lot of people, as well as keeping the drone close to you and at a reasonable altitude. Start by getting familiar with the control sticks—the left stick adjusts altitude and rotates the drone, while the right control stick handles forward, backward, left, or right movement.
Once you get the manual controls down, you can work with the automated flight modes included with many modern drones. You can practice automated shots, including perfectly circular orbits and reveals in which the drone flies up and away from a subject to show its surroundings. Different aircraft have different automated flight modes, so you should spend some time checking out each option.
My final piece of advice is to follow a checklist before every flight. Here's the one I use:
Day Before Flight
Day of Flight
Those are the basic steps I recommend performing before every flight. You may find that you want to customize the list a bit. For instance, if you use filters, make sure you have the right ones. Or if you have a drone that supports interchangeable lenses, make sure you to pack the right optics.
DJI are the biggest brand in consumer drones.The new Mini 4K is not very different from the Mini 2 SE in terms of design; the airframe is the same and it takes the same batteries. If it wasn't for the name on the side it'd you'd probably not be able to tell the difference. Switch them on, however, and the Mini 4K has a good few more options in the camera resolution menu.
In essence, then, DJI is improving it's offering for the beginner.
Considering that the DJI Mini 4K is the best budget drone for beginners, it made an understated entrance. There were no bells and whistles, just a quiet appearance on Amazon, and I can see why: it's essentially the same drone as DJI's previous entry-level model, the Mini 2 SE, only with higher-resolution 4K video, which also enables a 2x digital zoom.
Video quality is further bolstered by a higher 100Mbps bitrate, but otherwise this is almost an identical drone to the Mini 2 SE. That's no bad thing – DJI has addressed the former's single weakness – 'just' 2.7K video – and priced its successor aggressively.
Since the Mini 4K was launched, DJI announced an all-new drone, the DJI Neo, which is even cheaper than the Mini 4K and shoots 4K video. However, the half-size selfie drone is an altogether different proposition. If you want the traditional drone-flying experience, complete with a 3-axis mechanical gimbal and sturdier flight performance including level 5 wind resistance, the Mini series, in which the Mini 4K is the new entry-level model, remains your best bet. If you want even simpler operation, and smart AI-subject tracking features, the Neo is a fun alternative.
The Mini 4K offers decent battery life of up to 31 minutes on a single charge, and if you opt for the pricier Fly More Combo bundle you'll get an extra couple of batteries and charging hub thrown in for good measure.
DJI offers perhaps the most rounded experience for beginner pilots, with clear tutorials on the DJI Fly app, through which you control the Mini 4K's flights, complete with a scaled-back selection of DJI Quickshots flight moves, including dynamic movements such as Helix, Circle and Boomerang that will quickly elevate the quality of your aerial videos.
If money is no object, the DJI Mini 4 Pro remains the most accomplished sub-250g choice, with its clever subject tracking and industry-leading flight safety features like omnidirectional object sensing. But if you simply want to see what all the fuss is about with drones without risking a huge amount of money, you can't go wrong with the DJI Mini 4K. It's excellent value, and the most capable sub-$300 / £300 drone on the market, even if the Neo has more flight options.
DJI lists the Mini 4K's flight time as up to 31 minutes, but that's measured in a controlled setting. What you actually get in real-world use is almost certainly less, and will be influenced by factors including wind speed and the flight maneuvers you're performing, and overall it's better to keep your expectations on the lower side. That said, with typical use in moderate wind I was averaging over 20 minutes, and I'm not sure that you'll find a better battery performance in another drone at this level.
I was also armed with the two additional batteries included in the Fly More Combo, effectively tripling flight times on any given outing, and the charging hub can be topped up on-the-go via USB-C.
The maximum transmission range is up to 10km, depending on what region you're flying in and what level of interference there is where you're flying. Users in Europe, for example, are restricted to 6km. In any case, beginners are unlikely to get anywhere near those kinds of distances on a single flight, and you'll need to make sure that Return to Home is set up for your take-off point in the likely event you get disorientated as to the drone's position.
You can configure the Mini 4K's max possible altitude and flight distances, and the height at which it rises to when Return to Home is initiated. There's a 500m altitude cap, although if you're playing it safe as a beginner you should stick to 150m or lower, which will likely be the legal limit in your region anyway if you don't have a certificate of competency. Again, max distance can be set up to 5000m or the limit removed entirely, but when you're starting out it's probably a good idea to stick to much closer. The Mini 4K is fed all of this data through GPS + GLONASS + Galileo satellite systems.
On the controller you'll find three flight modes: Cine, Normal and Sport, each with a different max speed and responsiveness. Cine mode is the slowest of the three, designed to get you the smoothest possible aerial videos, while of course Sport is the niftiest to unleash piloting fun.
Flight speeds in Sport mode top out at 35.79mph and are no match for FPV drones in manual mode such as the DJI Avata 2, but are plenty quick enough while you find your feet and build your piloting skills. Cine mode is significantly slower than that.
And then there's DJI QuickShots flight moves, which include Dronie, Helix, Rocket, Circle, and Boomerang. Circle performs a lateral 360-degree move around your chosen subject – you simply select suggested subjects or draw a box around the chosen subject, and off the drone goes into action. Boomerang does a similar move while gradually gaining height.
These simple flight moves can improve the quality of your aerial videos as you center on points of interest around you. Other DJI drones have additional QuickShots moves in Spotlight and Follow. The Mini 4K does not offer Follow, and it lacks Follow Me subject tracking, which you get with pricier models and even the new Neo selfie drone.
The Mini 4K's 1/2.3-inch sensor is larger than the sensor found in the Neo, and smaller than the one in the Mini 3 and Mini 4 Pro drones. As such, its 4K video image quality sits somewhere in the middle in terms of color depth, dynamic range and low-light clarity.
That sensor size is roughly equivalent to what you'd find in a standard smartphone, only you don't have the computational photography modes and HDR settings afforded to today's handsets; if the sun is directly in your shot, expect blown-out highlights. However, I still found detail to be very sharp at first light before the sun lapped over the landscape.
Video resolution tops out at 4K 30fps, while cinematic half-speed 60fps videos can be shot in 2.7K and Full HD resolutions. Photos are up to 12MP (in 4:3 aspect, with a 16:9 cropped format also available) and can be shot in either JPEG or raw, with the latter offer more editing flexibility. Files are recorded onto microSD card, with compatibility for cards up to 256GB.
DJI has upped the maximum video bitrate to 100Mbps (it was 40Mbps in the Mini 2 SE). So not only does the Mini 4K offer higher-resolution video than the Mini 2 SE, but its 2.7K video is also less compressed.
There's a standard color profile for photo and video – what you see is what you get. However, you can easily edit the colors in raw DNG format photos in your choice of photo editor. If you're a keen editor, you'll probably want to shoot photos in both raw and JPEG, just in case the JPEG photos aren't to your taste. However, there's no flat color profile for video, which is pretty normal for a beginner drone, so there's not much scope for color-grading videos.
What's unusual for a drone at this price point is that you can switch from the Mini 4K's Auto setting to a Pro mode for manual control over exposure settings for photo and video, including the 1/30 to 1/8000 shutter speed and ISO 100 to 3200 ranges. That's an excellent feature for discerning image makers, though I suspect most people will keep the Mini 4K in Auto and be pleased with the results.
The three-axis gimbal offer a -110° to 35° tilt range, -35° to 35° of roll and -20° to 20° pan, and works in tandem with image stabilization to give you smooth video footage. Unless you're fighting high winds or making jerky movements on the controller – which requires significant finesse – then you can expect super-smooth video footage, especially in Cine mode.
Buy this if...
If you’ve just bought a new drone — or you’re about to — there’s every chance you’ll be itching to get airborne. After all, the best drones make it easy and entertaining to shoot photos and videos from the sky. From small folding drones to bigger premium models, these flying machines are the fun-sized future of aerial imaging.
But there are a few important things to keep in mind before you head for takeoff. While flying a quadcopter should be fun, it should also be safe. That’s why it’s important to take precautions before taking to the sky. This means researching the legal requirements for purchasing and flying a drone, finding a safe place to fly, and understanding how to pilot your craft in a way that doesn’t endanger you or the public around you.
If that sounds like a lot to digest, don’t worry: we’ve put together these top tips to help drone beginners get off the ground. While this isn’t a complete course on how to fly a drone — and shouldn’t be treated as a substitute for one — the advice below should give you a solid foundation for approaching drone flight, as well as some key things to keep in mind when you’re at the controls of a quadcopter. With the right mindset and plenty of practice, you’ll be a drone pro in no time.
If you’ve already purchased your first drone, you can skip to the next section. But if you’re yet to choose a quadcopter, there are a few things to keep in mind. While flagship drones offer the best flight times, safety features and camera performance, most will be overkill for first-time flyers.
What’s more, they also tend to come with a hefty price tag attached. This isn’t just important for your bank balance: when you’re learning to fly a drone, the fear of crashing an expensive model can add unwelcome stress to the experience.
Importantly, the best beginner drones are accessibly priced. They aren’t cheap toy drones that will blow away at the first hint of wind. Instead, they offer excellent value for less than the cost of a long-haul flight. All of them are fundamentally novice-friendly, but depending on your budget, you’ll have different options to choose from: the cheapest are relatively basic, while the best offer more room to grow. You can also consider slightly older models.
Before you get airborne, you’ll need to research the legalities of drone flight in your local area. To keep the skies safe for everyone, drone laws tightly regulate what, where and how you can fly. Rules are usually strictest around restricted airspace — you can’t fly close to airports, for example — and in built-up areas, where privacy is a concern.
If your drone weighs less than 250g, many regions — including the US — don’t require you to register with a civil aviation authority. Even if registration isn’t necessary, you will still need to follow other rules. Most drone laws mandate that you must maintain a line of sight with your drone, for example. Many also limit the height at which you can fly: in the UK, the Drone Code sets this ceiling at 120m above the ground. If you’re flying an FPV drone like the DJI Avata, you’ll need an observer with you, too.
Certain countries require registration, whatever the weight of your drone.Before your first drone flight, be sure to research the laws applicable to your location. Breaching these legal requirements can result in hefty fines or even jail time. While this might seem draconian, the rules are designed to ensure you’re a safe flyer.
With registration out of the way, the next step is to understand what your drone can and can’t do. While the latest drones have a range of safety features and pilot assistance skills, not every model is the same. The last thing you want is to find yourself mid-flight, wondering how exactly your drone can help you out of a tricky situation.
We suggest carefully studying your drone’s spec sheet and user guide. You’ll want to know how long your drone can fly for with a full battery, so that you can plan your flights accordingly. You’ll also want to understand whether it has a return-to-home mode, and how this can be activated. Many beginner drones can automatically fly back to their start point, either when you hit a button or when the battery drops below a certain level. This is a useful option if you lose sight of your drone.
Most drones have a transmission range of several kilometers, much further than the line of sight rules in most countries’ drone codes. That said, it’s still worth knowing how far your drone can technically fly. It’s also good to know your drone’s windspeed resistance: as a rule of thumb, this is two-thirds of its maximum speed, but you’ll find the exact numbers by consulting your drone’s spec sheet.
Finally, look at whether your drone has obstacle avoidance sensors. These are a safety feature which you won’t find on many beginner drones. If your drone has them, they can help you steer clear of trees — but the system doesn’t work the same way on every model. Some drones only have sensors on the front, while the best have three-axis sensors. Similarly, certain drones will stop in place when they detect an obstacle, while others are smart enough to steer around. Unless you’re only planning to fly in wide open spaces, you’ll want to know if and how your flying machine can help you avoid mid-air collisions.
Once you’re familiar with your drone’s skills and abilities, it’s time to get yourself accustomed to its flight controls. By doing this before lift-off, you’ll reduce the likelihood of making knee-jerk inputs when airborne.
Drone controllers come in a range of shapes and sizes. Many drones can be flown using a connected smartphone, either by itself or by attaching it to a compatible control accessory. Some FPV drones work with motion-sensitive joysticks that let you make intuitive inputs while wearing a headset. Most drone remotes, though, adopt a standard dual-joystick setup, even if the ergonomics vary by brand and model.
In general, the left joystick controls a drone’s altitude and rotation. Pushing it forwards and backwards adjusts the height of your quadcopter, while pushing it left and right causes it to rotate in that direction. The right stick is usually responsible for a drone’s roll and pitch. Pushing forward or back on it will cause your craft to tilt and move forward or back. Pushing to either side will result in it banking and strafing (without rotating).
However your drone’s remote is configured, remember that the outputs are reversed if it’s flying towards you — so pushing left on the roll stick will move it right from the pilot’s perspective. This can take some time to wrap your head around, so it pays to start slow (see below).
Other buttons and shortcuts will be specific to your controller. Many feature a speed toggle, a return-to-home shortcut and a hover button. Some more advanced remotes have integrated touchscreens which show a live video feed from your drone’s camera. Premium remotes might also include customisable buttons and precision camera controls, such as shutter triggers and scroll wheels for panning and tilting the gimbal.
With familiarisation sorted, it’s time to find somewhere to fly your drone. As above, your first criteria should be legality: consult your local drone regulations to check which zones are fit for take-off. Anywhere near an airport flight path is an automatic no-go, as are most residential areas.
Ideally, you’re looking for a wide open area, such as a park or field. If it’s private grassland, be sure to get permission from the landowner before considering a flight. Either way, you’ll need to survey the vicinity for potential hazards, particularly power lines and trees. These don’t mean you need to cancel your flight plan, but you’ll want to keep well clear.
Also think about the terrain: flatter is better, to ensure you can maintain a line of sight at all times. For your first few flights, consider asking a friend to join you as an observer. This way someone will always have eyes on your quadcopter — and any obstructions it might encounter — even if you look down to adjust the controls.
If you do need to make an emergency landing, it helps if your surroundings make drone recovery easy. We don’t recommend flying over water until you’re a confident pilot.
Tempting as it might be, don’t get airborne without first double-checking your drone setup and chosen location. Conduct a visual inspection of your quadcopter, to ensure everything is securely assembled and that there’s no obvious damage to the body, camera or propellers. Check the battery levels of both your drone and controller before lift-off, so that you have a clear idea of available flying time.
You should also assess the weather and visibility, both what’s forecasted and what’s in front of you. Be especially alert to changeable wind conditions, which can drastically affect the handling of your drone. You should already know the maximum windspeed that your drone can safely handle (see above) but it still pays to think carefully before flying on gusty days. Similarly, consider the likelihood of rain: showers can damage your drone’s electronic components, limit visibility and reduce transmission range.
Finally, confirm that your drone is connected to your controller and fully calibrated, and that your memory card is correctly inserted. If your quadcopter is equipped with GPS, ensure that it’s locked on to a satellite signal. And if it’s your first flight, run through a quick mental reminder of the function of each control input.
Assuming that you’ve followed all of the tips above, you should be ready to get airborne. Start by turning on your drone and placing it on the ground in front of you. Do a final inspection of the area around you and, if you’re sharing the area with others, announce that your drone will be taking off. Then, maintaining visual contact, gradually push the controller’s throttle stick forward until your drone lifts into the air.
At this stage, don’t try anything more adventurous. Instead, keep your drone hovering a few feet in the air. This controlled hover should help you get comfortable with assessing information while your drone is airborne, such as real-world wind conditions. Remember that you’ll also need to monitor battery levels during every flight, however short, to ensure that you have enough power remaining to safely return to the landing zone.
When you’re ready to bring your drone down, perform the reverse of the take-off procedure. If it’s drifted from its take-off point, use gentle inputs to steer it back towards the target area, before alerting anyone nearby that it’s coming down. Pull back slowly on the left stick to avoid slamming your drone into the ground. Once it’s touched down and the props have completely stopped, switch off your drone to keep fingers safe.
If you’re keen to keep practising, we recommend investing in a few spare batteries.
After a few hovers, you should start to understand how your drone handles in the air. Next is to build up your confidence with the controls. At this stage, it’s all about going slow and using careful inputs to steer your quadcopter; yanking on the sticks can quickly see you lose control.
Follow the steps above to bring your drone to a hover, then try flying forwards and backwards with the right stick. Use moderate inputs to maintain a steady speed, moving just a few feet in either direction. Once you’re back in a hover, you can try moving to either side by pushing the right joystick to the left and right.
Because drones tilt and roll to move, you might lose altitude during these manoeuvres. This is a good time to introduce simultaneous inputs on the left stick: push the throttle stick forward to regain any lost height. You can also use that same stick to keep your drone facing in the right direction, by pushing left and right to rotate it.
You can bring these basic movements together by flying in a simple square pattern. Keeping your drone facing away from you, fly straight forwards before pausing in a hover. Then use the right stick to roll it a few feet to the left or right, before again coming to a hover. To complete the square, pull the right stick towards you to bring the drone back a few feet, before rolling it back to the start point.
Once you’ve mastered the basics of drone flight, you can try your hand at some more advanced aerial techniques. Many top drones feature automated modes which can execute skilled manoeuvres at the touch of a button — all you have to do is make sure their path is clear of obstacles. But half the fun of flying is learning to perform these tricks yourself.
Circular patterns are a good place to start, because they require you to use multiple inputs at the same time. From a hover position, push the right stick forward, then set the drone into an even turn by moving the left stick to the left or right, and holding it steady. This combination of forward momentum and constant yaw will lead it to fly through a full circle.
You can then add roll into the equation to fly a banked turn. Repeat the technique above, but instead of pushing the right stick directly forward, push it diagonally forward in the direction of the turn. You’ll also need to use the left stick to add throttle inputs to maintain the drone’s altitude.
Even something as straightforward as flying in a banked circle requires inputs on both axes of both joysticks. This gives you a good grounding in the level of control required to achieve smooth drone flight. You’ll need to monitor and adjust for pitch, roll, yaw and elevation simultaneously, with your drone often facing in a different direction to you. This requires plenty of practise before you pick up speed.
After you’ve mastered it, though, you’ll be well-placed to tackle figure-of-eight patterns, before moving on to continuous drone flight. And once you’ve earned these wings, you’ll be able to make the most of your drone’s camera abilities — or simply relish the fun factor of a tiny flying machine.